One of the perks of being a graduate student is the number of "extra" holidays one gets. These are school holidays, such as spring break in March! and boy, do I love spring break. It is the time where I can afford some spring cleaning in the truest sense and get down to starting many things on my always-brimming-to-the-full to-do list, like this food blog for instance. Being on spring break also gets me more time to experiment with my culinary instincts. I've been cooking regularly but yesterday I decided to put on my baking hat. From my childhood I have been fascinated with baking, in fact, the first cooking class I ever went to was a baking class by Sevanti Jayaratnam. She baked these amazing, gorgeous, beautiful cakes. I had eaten one of her cakes for my 13th birthday and I was hellbent on attending her baking class that summer. I learnt so much from her class, the basics of baking, the importance of timing and consistency, and some tips and tricks to get that cake in your oven to look and taste the best. When I grew up, however, I was more interested in the cooking side of things. I did bake occasionally, but having access to baking goods, an oven were things I did not have during my long hostel stint in my graduation days. The last couple of years have only seen me bake the chocolate cakes and banana cakes, so when I baked this new york cheesecake yesterday I was apprehensive about how it would turn out. First verdict: not bad, second verdict: yum, yum, yum :)
 Who doesn't love a classic NY cheesecake? I do, and I'm sure you do too. So, here is the recipe if you want to whip one up for your loved one.
Recipe: New York Cheesecake with cherry topping serves 4+
Ingredients
for the sauce (optional) Cherries 16 oz (I used Maschino cherries, but you can use fresh ones too) Sugar 1/4 cup Lemon juice 2 tbsp Corn flour 2 tbsp (mixed into a paste with a little water)
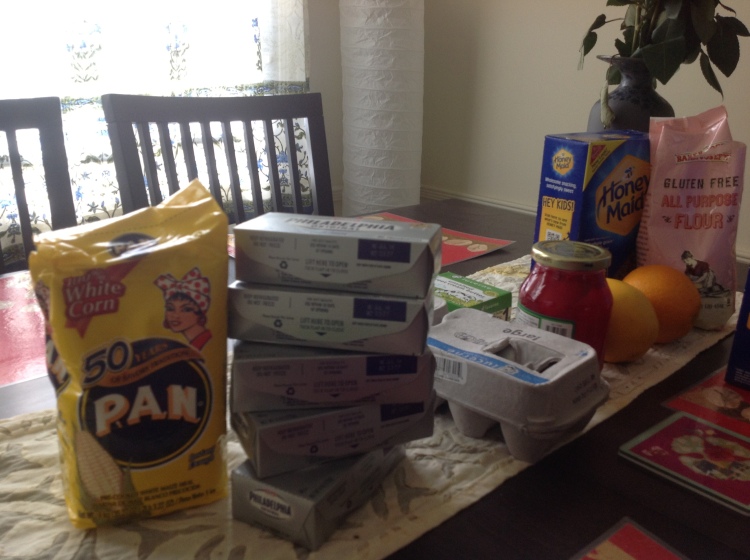
for the cheesecake Cream cheese 5 (I used philadelphia cream cheese) Vanilla essence 1 tsp Sugar 1 3/4 cup Eggs 5 large Yolk 2 All purpose flour 3 tbps Lemon zest 1 tsp (I used freshly plucked lemons from my friend's garden) Orange zest 1 tsp
for the crust Graham crackers 18 oz or 15 sheets of crackers (I used Honey maid) Butter, unsalted 4 oz or 1 stick (I used lucerne) Sugar 1/2 cup Salt 1/4 tsp salt
gadgets Food processor 9 1/2 inch springform pan Baking plate Grater
Preparation
The first golden rule of baking cheesecake (or any cake for that matter) is to bring all the ingredients to room temperature. Pull out the eggs, butter, cream cheese, lemon, orange, vanilla essence from the fridge. Let these come to room temperature. I can't stress how important it is to do this. You don't want to end up with a clumped up cheesecake, so put aside ample time for ingredients to come to room temperature. Wash the eggs and pat dry them. Remember, not even the tiniest amount of water in your baking.
First step, let's get started with the crust. The best part of the cheesecake is the crust. So yum and crunchy. Take the graham crackers and finely ground them. I started mistakenly by thinking I can grind them with my own hands, wrong, very wrong. You won't be able to grind them finely. After the unsuccessful attempt, I tried to grind them using a masher (I believe a muddler would work just as well). This worked a little bit better than my own hands, but not by a whole margin. Finally, I just dumped everything into my food processor, and voila, the graham crackers were ground in a jiffy. After this, melt the butter on stove top and mix this thoroughly with the finely ground graham crackers. Mix in the sugar and the salt. Mix everything together. Grease a 9 1/2 inch springform pan with butter and stick the crust on it, first the bottom of the pan and then the sides of the pan. You can also put the mixture in the freezer to set before greasing the pan. I did put it in the freezer and then pull it out just as I was ready to put the cheesecake into the oven. Keep the pan aside while you prepare the batter.
[gallery ids="31,32,34,35"]
Preparing the cheesecake batter
This is the part I love, making that goey, oh so yummy batter, the core of the cake. Take the cream cheese, transfer them into a bowl. Using an electric mixer, beat the cream cheese. Remember before this step, make sure your cream cheese is at room temperature. After you have swirled around a little bit, add sugar and mix thoroughly. Next, add the flour. In between, use a spoon to make sure everything is getting mixed evenly. Add the vanilla essence, beat once. Now add the 5 eggs, one by one, mixing thoroughly, followed by the 2 egg yolks. Ensure that the mixture is even. Now, grate the lemon and orange using the grater. Add these one by one to the mixture and beat again. Next, take the greased pan with the crust and pour this mixture into it. The batter will cover the entire pan.
[gallery type="square" ids="39,40,41"]
Baking
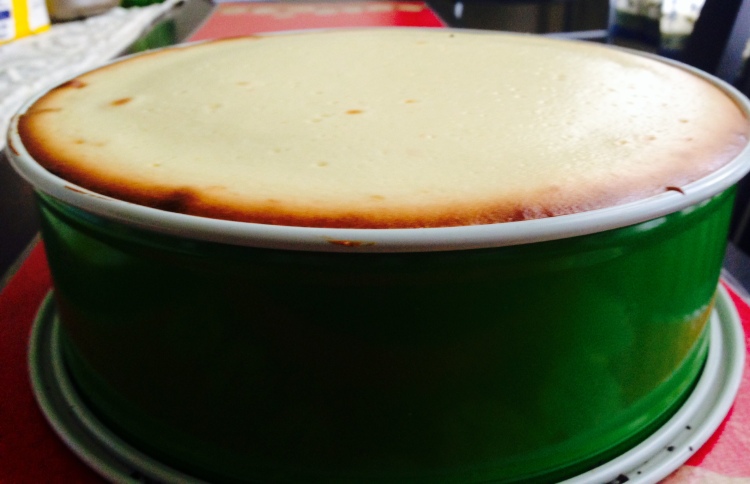
Preheat the oven till 475 F. Since I used a teflon coated nordic ware, sprinform pan, I started baking at 475 F. This is because the maximum temperature withstood by non stick is 475. You can go upto 550 F if you are using some other baking pan. At 475F, bake the cheesecake in the center of the oven till the top starts browning. This depends on your oven, but approximately should take 10-15 mts. Keep eyeballing your oven, because you don't want the cake to brown too fast. Once it browns and rises slightly, lower down the temperature to 200F and continue to bake for another hour or until it is set. To test whether your cake is baked, tap the side of your pan with a spoon. If the cake wiggles as one semi solid body, you are done baking. If it wobbles too much and still feels too liquidy in the middle, continue baking. Remember, it is okay that the center of the cake is wobbly. It will set when you put the cake in the fridge. Take out the cake and let it cool to room temperature. Put it in the freezer for at least 6 hours, the longer the better.
Preparing the sauce
While the cake is setting in the fridge, prepare the sauce and keep it aside. In a saucepan, bring the cherries, sugar, lemon juice, and corn starch to a boil. Let it boil for 3 minutes or so. Cool to room temperature.
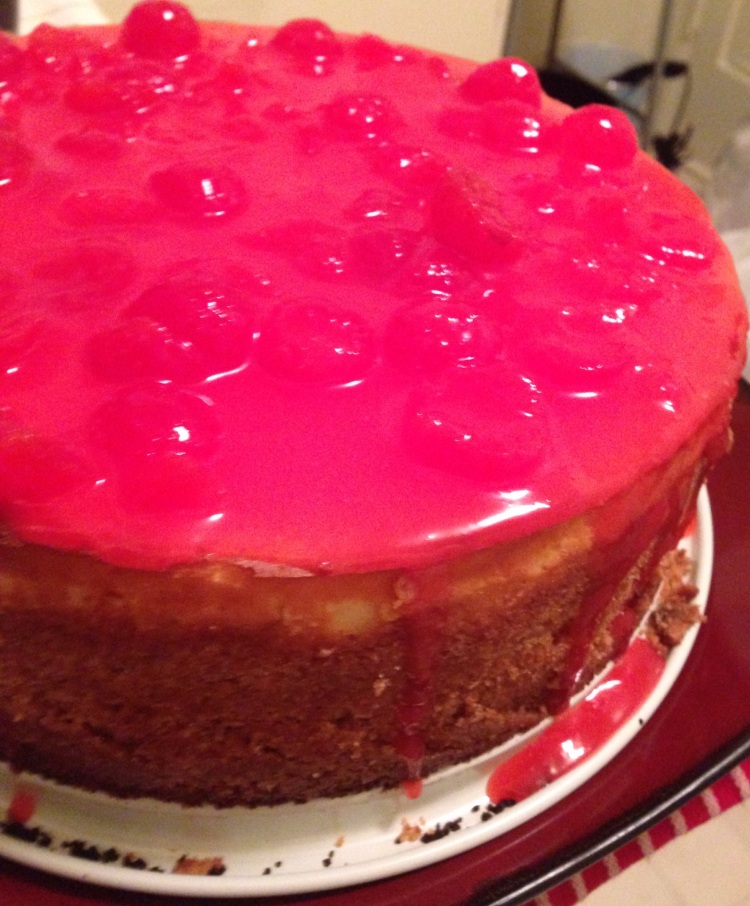
Once the cake has been set (I left it in the fridge for 8+ hours), open the side of the pan. Now pour the sauce all over the top. Devour immediately or keep chilled and slowly devour it for about six days. Call your friends over for some tea and cake, trust me, they won't be disappointed :)
[gallery type="square" ids="44,45,46"]


